1. Partial Cutout
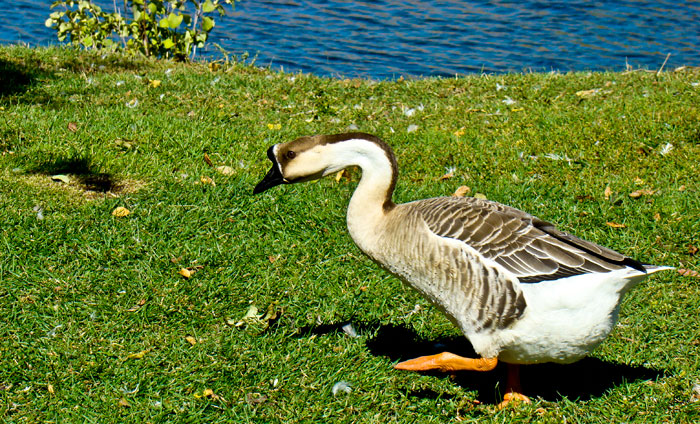

1. Goose; 9.24.2010; 12:17 p.m.; Rexburg, ID; f/5.6; 1/640;
Sony DSC-H7; Edited in Camera Raw
This image was taken at the duck pond earlier this semester. I opened the image in Camera Raw and added saturation, levels, and contrast. I then opened the image in Photoshop. In Photoshop, I copied the layer and used the rectangular marque to select the part of the image I wanted to remove. Then, I created a new layer and filled it with white and hid this layer with the eye icon. Next, I went to the image layer and selected the entire image I wanted to remove using the quick selection tool. I chose select-refine edges to smooth out the selection, add feathering, and add a shadow. To get the the grass selection to be a straight line, I added a mask on this layer. Finally, I copied the selection to a new layer and dragged it to the top of the layers. I also made sure that all of the layers were showing and not hiding.
2. Full Cutout


1. Grasshopper, 9.24.2010; 11:30 a.m.; Rexburg, ID; f/5.6; 1/1250;
Sony DSC-H7; Edited in Camera Raw
This image was also taken earlier in the semester in the campus gardens. I edited the clarity, vibrance, and contrast of the image in Camera Raw. I then opened the image in Photoshop. In Photoshop, I copied the layer and used the rectangular marque to select entire image. Then, I created a new layer and filled it with white. I used the eye icon to hide this layer. Next, I went to the image layer and selected the entire grasshopper with the quick selection tool. I chose select-refine edges to smooth out the selection, add feathering, and add a shadow. Finally, I copied the selection to a new layer and dragged it to the top. I also made sure to click on the eye icons to show all of the layers.
No comments:
Post a Comment