Saturday, October 16, 2010

Week 6: Enhancements

1. Portrait Enhancements


1. Olivia; 10.15.2010; 1:55 p.m.; Rexburg, ID; f/3.2; 1/125;
Sony DSC-H50; Edits in Camera Raw and Photoshop

This picture was taken outside of the library. Olivia is Brother Olsen's, a school librarian, daughter. She had just eaten a snack when I asked if I could take her picture. So, she had food all over her mouth. To edit this picture, I opened it in Camera Raw. Then, I added recover, fill lights, contrast, clarity, and vibrance. I then opened the image in Photoshop and copied the layer. In Photoshop, I had to use the clone stamp to get rid of the food marks and a scar on Olivia's upper lip. Then, to make the clone stamping more even, I copied the layer and used the brush tool to take parts of Olivia's skin color and  smooth it over her face.
2. Replace Color


1. Laurence; 10.15.2010; 1:30 p.m.; Rexburg, Idaho; f/3.2; 1/800;
Sony DSC-H50; Edits in Camera Raw and Photoshop

Laurence is a nice, but shy guy. He wasn't up for taking a candid shot. He only really felt comfortable doing posed shots in front of a plain background. Unfortunately, the only plain wall around was a wall that matched the color of Laurence's shirt. So, I decided to use this picture for my color replacement photo. To edit this photo, I first opened it in Camera Raw. I increased the contrast, clarity, vibrance, and sharpness. Then, I opened the image in Photoshop. In Photoshop, I copied the layer. Then used the quick selection tool to select just the shirt. Then, I went to image-adjustment-replace color. I clicked on Laurence's shirt in the screen and I increased the fuzziness slider to 100. I then changed the color using the hue and saturation sliders in this palette.

3. Match Color
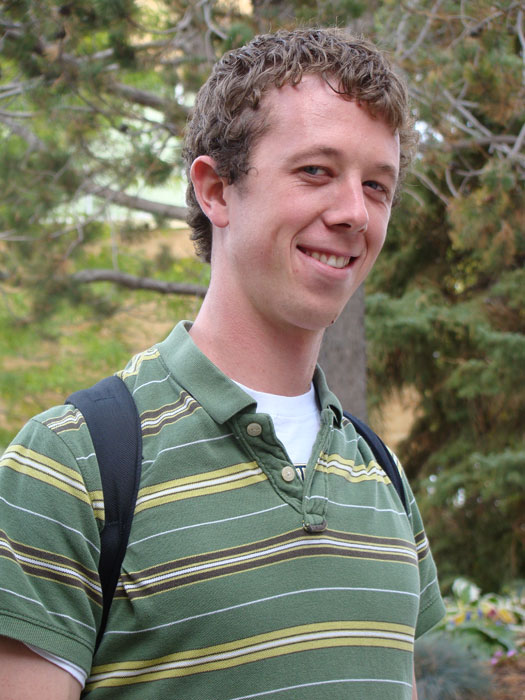


1. Caleb with Backpack; 10.15.2010; 1:47 p.m.; Rexburg, Idaho; f/3.5; 1/125;
Sony DSC-H50; Sized in Photoshop
2. Caleb's Smile; 10.15.2010; 1:44 p.m.; Rexburg, Idaho; f/2.8; 1/320;
Sony DSC-H50; Sized in Photoshop

These pictures were taken outside of the library. I really liked the second photo a lot more than the first because the lighting and color was better in this shot. I also liked Caleb's smile. Caleb, however, hates this picture and claims that it makes him look funny. So, I decided to replace the color on the first photo with the color from the second photo. To do this, I opened both photos in Photoshop. Then, I selected the first image and went to image-adjustments-match color. In this palette, I selected the second photo as the source photo, and I used the fade slider to slightly fade the effect. I also added luminance to the image with the luminance slider in this palette.

Week 6: Portraits


1. Caleb; 10.16.2010; 4:08 p.m.; Rexburg, ID; f/2.8; 1/640;
Sony DSC-H50; Photo edited in Camera Raw
2. Kathleen; 10.14.2010; 1:33 p.m.; Rexburg, ID; f/2.8; 1/80;
Sony DSC-H50; Photo edited in Camera Raw
3. Jessica; 10.14.2010; 2:15 p.m.; Rexburg, ID; f/3.5; 1/160;
Sony DSC-H50; Photo edited in Camera Raw
4. Merritts; 10.16.2010; 4:04 p.m.; Rexburg, ID; f/2.8; 1/200;
Sony DSC-H50; Photo edited in Camera Raw

The picture of my husband Caleb was taken outside of Craigos in front of a random bus. I edited this photo in Camera Raw by increasing the fill lights, changing the contrast, adding a little vibrance and clarity, and a slight vignette. Kathleen's picture was taken in the library. The lights in this building were really hard to work with. So, for this picture, I increased the exposure in Camera Raw. I also added sharpness, clarity, and luminance in Camera Raw. Jessica's picture was taken outside of the Clark building. The picture of the Merritts was taken outside of Craigos. For both of these photos, I added fill lights, contrast, clarity, vibrance, sharpness, and a slight vignette in Camera Raw.

Friday, October 8, 2010

Week 5: Camera Raw


1. Farm; 10.8.2010; 2:15 p.m.; Rexburg, ID; f/8.0; 1/400;
Sony H50; Tripod used

This picture was taken in the rain. So, I had a friend shield the lens of the camera while I took the shot. To edit this photo, I opened it in Camera Raw. In Camera Raw, I first created a highlight using the brush tool over parts of the sky. Then, I added a blue color to the highlighted area. I also increased the contrast, brightness, exposure, saturation, clarity, and sharpness of the highlighted parts. Next, I increased the fill lights, blacks, contrast, clarity, vibrance, and saturation in the basic palette to the whole image. I also wanted the ground to look more yellow instead of brown, so I played with the orange and yellow color sliders in HSL grayscale to bring out the yellow color. I also increased the temperature slider to the yellow side. Then, I changed the tone curve to medium contrast. Finally, I added detail to the sharpening palette and a slight vignette to the image with the fx palette.

Challenge


1. Road; 10.8.2010; 2:12 p.m.; Rexburg, ID; f/8.0; 1/500;
Sony H50; Tripod used

This image was also taken in the rain. After taking the shot, I opened the image in Camera Raw. First, I increased the recovery and the fill shadows. Then, I increased the clarity and vibrancy. Next, I opened the image as a smart object in Photoshop by clicking the text in the bottom middle of the window in Camera Raw. In Photoshop, I copied the layer and added more blue to the picture through the color balance palette. With the color balance palette, I selected midtones and moved the first slider toward the cyan side. Finally, I masked out this effect on everything but the sky.


Week 5: Panoramic


1. Field 1; 10.8.2010; 2:06 p.m.; Rexburg, ID; f/8.0; 1/500;
Sony H50; Tripod used
2. Field 2; 10.8.2010; 2:06 p.m.; Rexburg, ID; f/8.0; 1/500;
Sony H50; Tripod used
3. Field 3; 10.8.2010; 2:06 p.m.; Rexburg, ID; f/8.0; 1/500;
Sony H50; Tripod used
4. Field 4; 10.8.2010; 2:06 p.m.; Rexburg, ID; f/8.0; 1/500;
Sony H50; Tripod used

These pictures were hard to take because I took them in the rain, and rain drops kept hitting the camera lens. Luckily, I had a friend with me, and I had him block the rain from the camera. In addition to this, I couldn't get really close to the pivot because I didn't want to go walking in a farmer's field. So, I had to use a lot of zoom. After taking these shots, I merged them together in Photoshop by going to file-automate-photomerge. After merging the photos, I cropped the image in Photoshop and then opened it in Camera Raw. In Camera Raw, I increased the recovery, contrast, clarity, and vibrance.


Friday, October 1, 2010

Week 4: High Dynamic Range

Three Shot HDR:


1. Stairs Underexposed; 9.29.2010; 5:20 p.m.; Bannack, MT; f/5.0; 1/50;
Sony DSC-H7; Tripod and timer used
2. Stairs Normal Exposure; 9.29.2010; 5:24 p.m.; Bannack, MT; f/3.5; 1/25;
Sony DSC-H7; Tripod and Timer used
3. Stairs Overexposure; 9.29.2010; 5:29 p.m.; Bannack, MT; f/3.5; 1/20;
Sony DSC-H7; Tripod and Timer used

These pictures were taken in Hotel Mead. For these picture, I used a tripod and changed the exposure. The first shot had an exposure of -2. The second shot was 0. And, the third shot was +2. I used the timer to take these shots to prevent me from bumping the camera. Then, I ran all of these photos through Dynamic Photo to create my HDR. In Dynamic Photo, I played with the different settings in the toning map. I used the eye-catching mode. Then, I increased the brightness and vivid color. Finally, I added clarity and de-haze.

One Shot HDR:


1. Blue Tank; 9.29.2010; 3:55 p.m.; Bannack, MT; f/2.8; 1/60; Sony DSC-H7;
Sizing in Photoshop

This photo was taken at the Bannack Mill. To compose this shot, I placed the lock in front of the two items. I then took the shot. Next, I ran the image through Dynamic Photo. In Dynamic Photo, I played with the different settings under the toning map. I enhanced the vivid color, brightness, and saturation. I also turned on the sky setting. Finally, I added clarity and de-haze.

Week 4: Bannack Macro Abstract


1. Lock; 9.29.2010; 4:16 p.m. Bannack, MT; f/3.2; 1/10; Sony DSC-H7;
Tripod used and editing in Camera Raw and Photoshop
2. Wood; 9.29.2010; 9:45 a.m.; Dubois, ID; f/3.5; 1/320; Sony DSC-H7;
Sizing in Photoshop

For the picture of the lock and the wood, I used macro mode and a lot of zoom. For the lock, I had to use a tripod because it was in the dark mill and the shutter speed was slow. I edited the lock in Camera Raw by decreasing the exposure and adding highlights to the wood and lock. Then, in Photoshop, I copied the layer and added sharpness by using the smart filter. I masked out the sharpness on everything but the lock and wood. Then, I added a vignette by feathering and masking another layer. The texture shot was just sized down in Photoshop. To make my macro abstract, I put the wood in a layer over the lock. Then, I went to layers and chose overlay mode and decreased the opacity. Finally, I masked out the effect on everything but the lock.

Week 4: Bannack Reverse Shallow Depth


1. Fence Background; 9.29.2010; 5:05 p.m.; Bannack, MT; f/3.2; 1/2000;
Sony DSC-H7; Editing done in Camera Raw
2. Fence Foreground; 9.29.2010; 5:09 p.m; Bannack, MT; f/3.2; 1/2000;
Sony DSC-H7; Editing done in Camera Raw

For these two shots, I used a low aperture and a lot of zoom. To blur the foreground, I focused the camera on a back fencepost and pressed the shutter in half way. I then reframed the shot before completely taking the picture. To blur the background, I did the same thing, expect I focused in first on a close fencepost. I then edited both of these shots in Camera Raw by increasing the clarity and vibrancy of each photo.